

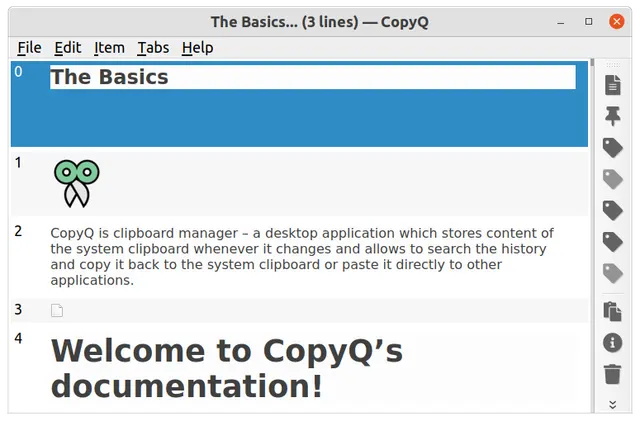
CopyQ keeps a searchable history of copied text and images on your computer. This guide explains the official Windows installation, a small practice workflow, recording controls and a selective backup. Instructions were checked against CopyQ 17.0.0 release documentation on October 18, 2026; AltStack has not installed CopyQ or executed these exercises. The genuine image comes from upstream documentation and may show another desktop theme. Before copying private material, understand that history is stored unencrypted by default unless encryption is configured.
1. Understand the free edition and its limits
CopyQ is GPL-3.0-or-later desktop software, and the official packages do not require a subscription or paid API. You can use it to retrieve an earlier paragraph, keep reusable snippets or organize copied material in tabs. It runs on Windows, Linux and supported macOS versions. Your computer, backup media and any separate synchronization service have their own costs. Donations support the project but are not a required clipboard-history payment.
This can replace local clipboard tasks that a paid manager performs, but compare the actual workflow before switching. CopyQ does not reproduce Paste’s iPhone/iPad and iCloud experience. It is also not a password manager, an encrypted vault by default, or a guarantee that a copied secret will never be recorded. Start with ordinary practice text and decide whether keeping a persistent history fits the data you handle.
2. Download the correct Windows package
Open the project’s official GitHub Releases page and choose the stable release. At review, version 17.0.0 provides copyq-17.0.0-setup.exe and a portable copyq-17.0.0.zip, alongside packages for other systems and checksum information. Choose the Windows setup executable for a normal installation, download it from the project’s release and follow the installer prompts. Keep the source link and version in your own notes. A downloaded file’s name alone does not prove that a third-party copy is authentic.
The portable ZIP is a different distribution choice: extract the package completely before opening its executable, and read the release instructions for its configuration behavior. Do not mix files from unrelated versions. For macOS, the current documented baseline is macOS 13 or later; select the appropriate processor package. Linux users should follow the official README’s distribution, AppImage or Flatpak route. This Windows walkthrough does not imply that those package paths are identical.
3. Open CopyQ and pause recording first
Launch CopyQ.exe or use the Windows Start menu. The provider notes that the normal Windows installation does not create a desktop icon by default, so an absent desktop shortcut does not establish an installation failure. CopyQ runs with a tray icon. Click it to show the main history window, or use the tray’s Show/Hide action.
Before experimenting with passwords, customer records or access tokens, pause recording with File > Disable Clipboard Storing, whose default shortcut is Ctrl+Shift+X. The corresponding Enable Clipboard Storing action uses the same shortcut. Read the menu state so you know which action is currently available. Pausing recording is separate from removing existing history or clearing the operating system’s clipboard. Keep the pause enabled until you have prepared harmless sample text and are ready to observe the behavior.
4. Create a small history you can recognize
Use an ordinary text editor and write three separate lines, such as practice-orchid, meeting-location-example and sample-project-reference. Re-enable clipboard storing and copy the first line, then the second and third. Open the CopyQ window and check whether those items appear in its history. This deliberate sample gives you an expected result; copying a large unknown document first makes a missing or unexpected entry harder to diagnose.
Select one practice item and press Ctrl+C to put it back on the current clipboard. Return to the text editor yourself and paste there. Confirm that the result matches the selected item. Repeat with another sample so the difference between current clipboard and stored history is clear. CopyQ’s recording does not create an independent copy of the original document or establish a backup of every application you used.
5. Find, edit and remove sample items
With the history list focused, type a distinctive part of one sample, such as orchid. The list filters to matching content. Select the expected item and copy it back with Ctrl+C; return to your text editor to verify the result. The upstream also documents Enter as an activation action, but automatic pasting depends on its preferences and the destination application. Using an explicit copy followed by your own paste is easier to inspect while learning.
For a selected text item, press F2 to edit it, change the sample wording and press F2 again to save. Check the saved wording before using it elsewhere. To remove a disposable sample from the list, select it and press Delete. Removing an item from history does not necessarily erase a copy that is still on the system clipboard, in an export, or in a destination document. Treat those as separate places to manage.
6. Add a global shortcut deliberately
Open the Commands dialog with F6. Choose Add, select Show/hide main window and confirm that selection. Use the button beside Global Shortcut to assign a key combination, then confirm the dialog. Choose a combination that is not already used by your text editor or another application. Try it while the text editor is focused, then use it again to hide the window.
This uses a predefined project action rather than a script copied from an unknown website. CopyQ supports powerful scripting and automatic commands; those can read or transform clipboard contents and should be reviewed as code. Do not import a large command collection merely to obtain one shortcut. If the shortcut does not work, first confirm that CopyQ is running and that the combination is not intercepted elsewhere. System-wide shortcut support can also vary by desktop environment.
7. Keep automatic paste behavior understandable
CopyQ can paste an activated item into the previously active window. Its FAQ places that setting under Preferences, opened with Ctrl+P, then History, with the Paste to current window option. Decide whether you want that behavior before enabling it. Start in a disposable text document and confirm both the destination and the pasted content. Applications can interpret pasted rich text, images and multiple items differently.
If you prefer explicit control, continue copying a selected item with Ctrl+C and pasting it yourself. The FAQ also documents separate predefined commands for pasting the current clipboard as plain text and pasting selected history items as plain text. They are different actions. Learn the ordinary text workflow before adding formatting transformations, so an unexpected paste can be traced to the actual action rather than several interacting settings.
8. Review privacy before using real material
The security documentation says that tab data is stored in the configuration directory without encryption unless its encryption feature is enabled. Local storage does not mean that another user of your account, a backup process or malware cannot read it. Protect the device account and backup destination, and avoid keeping sensitive clipboard content merely because a program stores it locally.
CopyQ recognizes certain secret markers used by password managers, private browser windows and other software, and its default behavior ignores recognized secret clipboard changes. This depends on the originating application and platform. It does not establish that every sensitive value is marked correctly. Do not override secret handling simply to make every copied item appear. Pause recording before sensitive work, review the official exclusion and encryption instructions if needed, and avoid using real passwords as a practice test.
9. Reduce what is stored
If you only need text, the FAQ describes Preferences > Items as the place to change stored item types. Disable the Web item and review the Text item’s Save and display HTML and rich text option to avoid retaining rich formatting. Images can also be disabled separately. These changes affect subsequent recording; they do not automatically remove every format already present in older items.
For a permanent recording stop, the documented route is Preferences > History and clearing the Tab for storing clipboard field. For temporary work, Ctrl+Shift+X is more convenient because it toggles recording without redefining the storage target. Choose the smallest amount of retention that serves your actual task. There is little benefit in collecting images, formatted pages and private fragments if you only need a few public text snippets.
10. Export only the tabs you intend to back up
Use File > Export and review which tabs to include, along with whether configuration and commands belong in that export. Select a small practice tab first and save the export to a protected location. An exported clipboard history may contain material copied from many applications, so do not upload it to a public issue or shared drive without inspecting its contents and access permissions.
The matching restore action is File > Import, where you choose the export file and what to restore. The FAQ says imported tabs and commands create new entries rather than overwriting existing ones. Inspect the imported practice material before repeating the process with important data, and keep the original export until you understand the result. This is a recovery exercise for the reader to perform, not a restoration test that AltStack has already carried out.
11. Troubleshoot one boundary at a time
If a copied item is absent, confirm that recording is enabled and the intended history tab is configured. Then retry with harmless plain text. A recognized secret marker can deliberately prevent recording, so a missing password-manager item is not a reason to disable privacy protection. If the main window seems absent, inspect the tray and Start menu before reinstalling.
If history does not survive a restart, review configuration-directory access permissions as the FAQ recommends. For a failed global shortcut, test another unused combination and consult the operating system’s shortcut settings. If Enter copies an item but does not paste into the target, inspect Paste to current window and the target application’s paste behavior. When reporting a problem upstream, include version, OS and non-sensitive reproduction steps. Clipboard dumps, screenshots and debug logs can expose private content; inspect them before sharing.
12. Check a small end-to-end workflow
Before making CopyQ part of your daily routine, repeat a short checklist with public sample text: open the application, enable recording, copy two distinct items, filter for the older one, copy it back, paste it yourself, edit one sample and delete another. Toggle recording off and confirm that the menu state reflects that choice. Finally export only the practice material and inspect an import.
You now have specific observations to compare with your needs. If local desktop history solves the problem, you can proceed with a conservative retention policy. If you need cross-device cloud synchronization, team sharing or a vault, evaluate those requirements separately rather than assuming a free clipboard manager supplies them. Keep the official release and documentation links available for updates; package requirements, supported platforms and application behavior can change.
Official instructions and sources
Official CopyQ 17.0.0 release and packagesOfficial stable installation READMEStable basic usage documentationStable shortcuts and backup FAQStable clipboard storage and security guidanceStable keyboard referenceStable tabs and items documentationCopyQ GPL licenseOriginal AltStack guide by Sushil Kumar Sah. Installation steps follow provider documentation; they do not imply testing on every supported device.